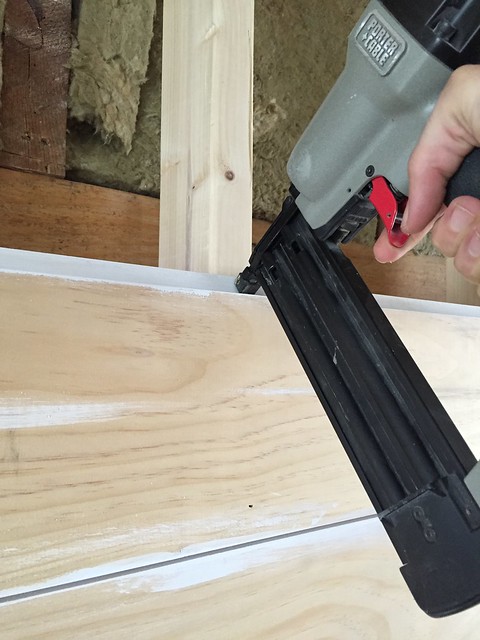
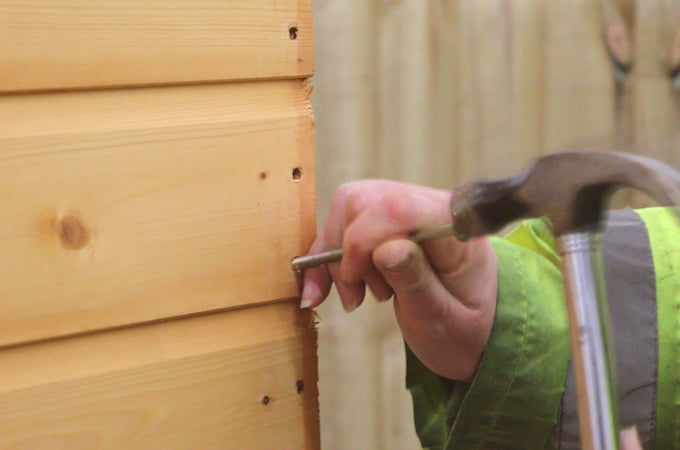
Place a nail through the top and bottom of each shiplap board where it crosses a stud. Nail or screw boards on each end and into every other stud 1 up from the bottom of the board.

I used my pin gun at about 65 PSI and that seemed to burry the nails just a little into the shiplap for easier spackling later.

How to nail shiplap boards. Insert the galvanized nail. Drive 2 trim nails into the flange at each stud use a pneumatic nailer and nails. Unscrew the drywall screws holding the furring strips to the wall.
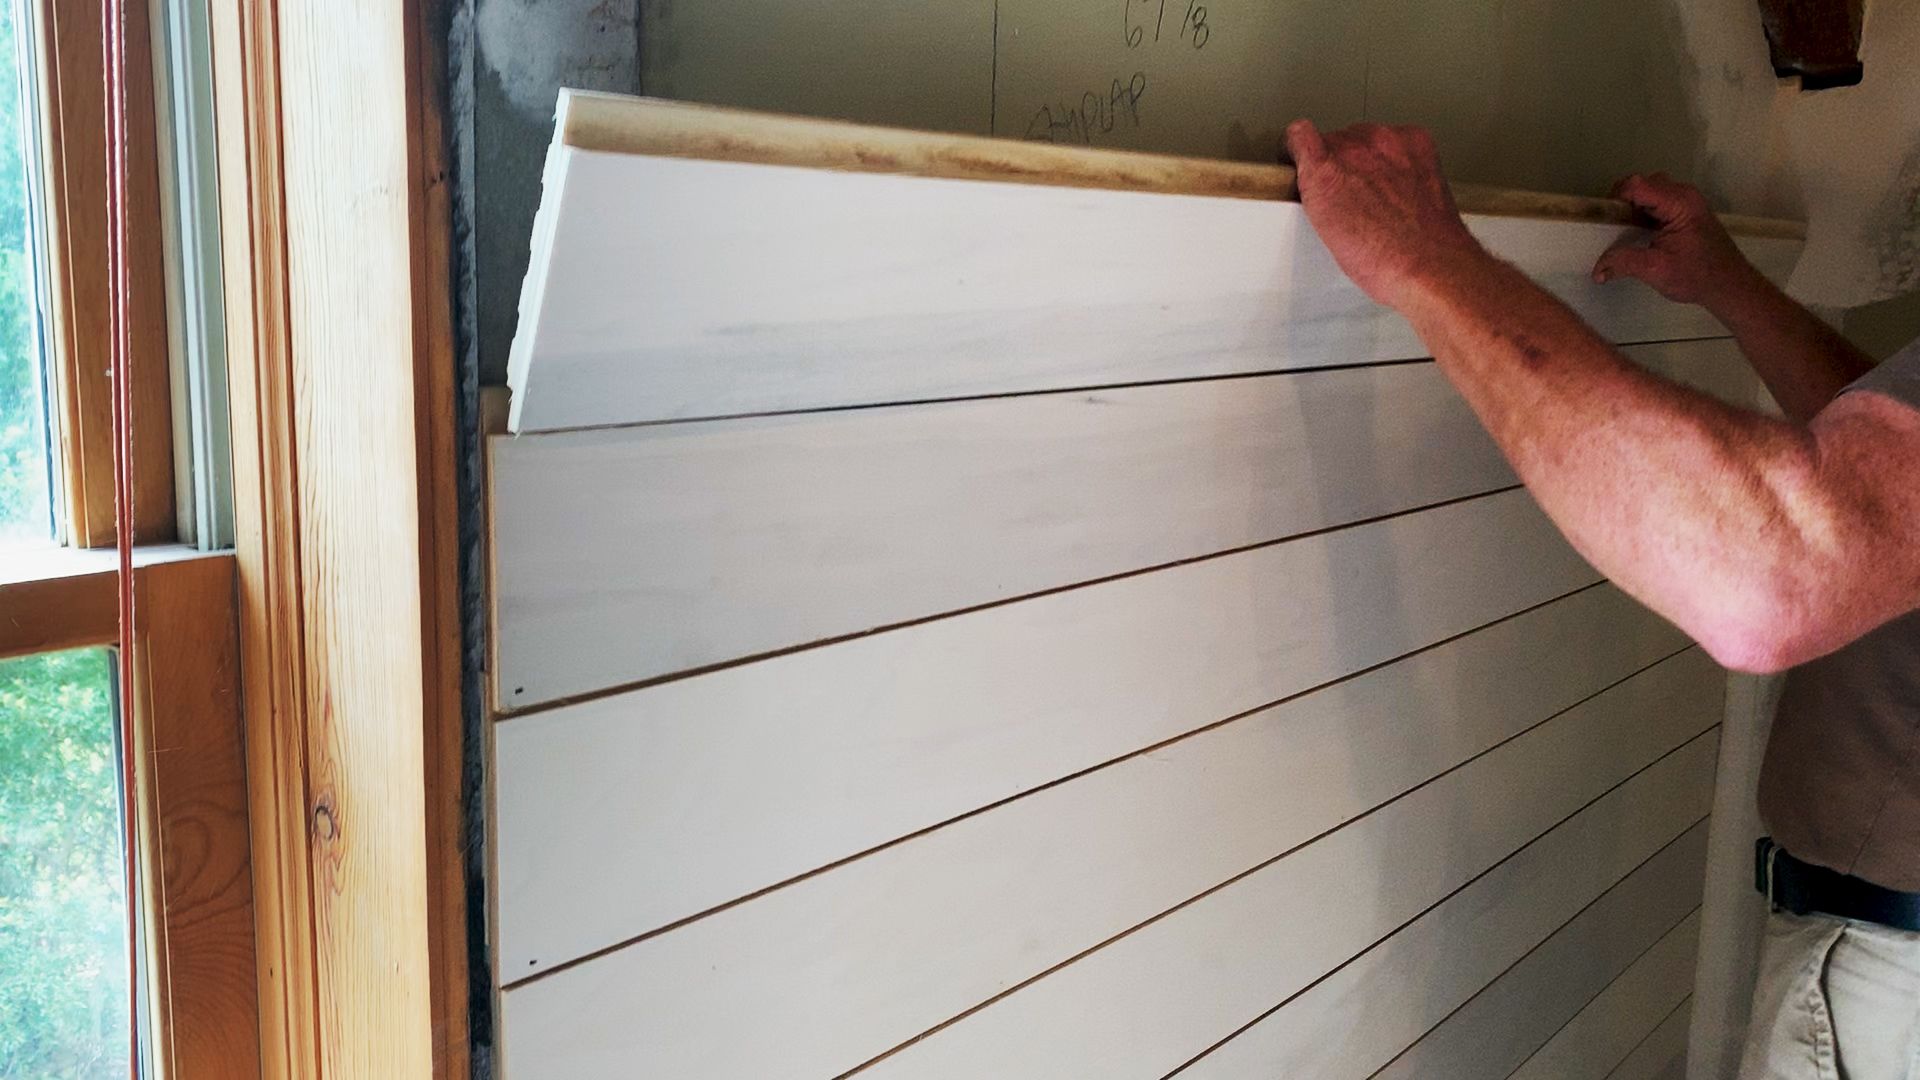
Once youre ready begin installing shiplap boards from the bottom of the wall. Starting at one end put two nails in the shiplap at each stud one in the face of the board and one in the tongue. Place a nail through the top and bottom of each shiplap board where it crosses a stud.
How do you nail a shiplap to the wall. On the first board a second nail should be placed approximately 1 from the bottom edge. If you want a smooth appearance with no nail holes then place the nails in the rabbets or tongues of the boards.
Then nailed the board to a stud to one side of the centre of the panel. First row of shiplap cladding in place. Work your way all the way across the bottom of the wall.
Use adhesive to glue the board down first or ask a partner to help you hold it in place. How to hang shiplap without a. If the panel is.
Attach the bottom board to the wall with two 2-inch nails in every wall stud. Use adhesive to glue the board down first or ask a partner to help you hold it in place. Using the right nail gun and nail sizes will help you attach the shiplap to your walls with ease.
Use adhesive to glue the board down first or ask a partner to help you hold it in place. Making sure that the bottom of the Tyvek membrane overlapped the base of the shed and also the first of the shiplap boards. With the assistance of a level to keep things even apply the first board starting at the bottom and work upward.
If you plan to paintsand the shiplap do so before nailing the boards in place. First place a board directly in the center. Place a nail through the top and bottom of each shiplap board where it crosses a stud.
Before you attach the next board place a nickel every few feet between the bottom board and the board above it. With a putty knife and drywall compound or Spackle fill the holes in the wall. Attaching the First Board.
Remove any remaining brads or finish nails either with the claw end of a hammer or with pliers. Before you attach the next board place a nickel every few feet between the bottom board and the board above it. Liquid nails is your best bet for application rather than nails.
You can nail at every stud if you choose but with shiplap every other stud keeps the wood very secure. Work your way down ensuring the board remains level and is resting properly on the piece below it. Remember that you do not have to cover the entire wall with shiplap.
MDF like other wood products with absorb and desorb moisture with changes in humidity. Starting in the middle of the wall attach the 1 x 6 boards to your wall. Using a stud finder locate the studs and mark them on the wall.
Its important that you nail board ends into studs so that boards dont bow outward and make the seams more visible. Make sure to find the studs and nail it into the studs with a nail gun. If you are impatient try using painters tape to hold in place while the boards dry.
Hide the Nails. If the exterior is longer than the shiplap boards stagger the seams. The spacing between boards is.
The Second Row For the second row stagger your lengths so that the seams do not match up. Ideally youll want as few seams and as little waste as possible. Nail through the top flange which is the longer of the two flanges.
Apply generously to the boards hold in place until the boards stick firmly on their own. Notice the varying lengths of shiplap on this 12 foot long wall and how the seams are staggered. Place one nail every 6 inches 1 inch above the routed channel for 6-inch-wide boards.
Your staggered boards may repeat a pattern like this. Use adhesive to glue the board down first or ask a partner to help you hold it in place. Use adhesive to glue the board down first or ask a partner to help you hold it in place.
Place the board flat against the wall with the flange on top. Apply a bead of construction adhesive to the back of the board. I used my spirit level to ensure that the first board was as level as I could.
Attach the Vertical Shiplap Boards. I started at the bottom. Pry off the shiplap with a prybar and set aside.
The entire design depends on the first boards being perfectly level. Place a nail through the top and bottom of each shiplap board where it crosses a stud.

 Shiplap Vastern
![]() How To Install Shiplap 7 Simple Steps C2s
How To Install Shiplap 7 Simple Steps C2s
Shiplap Guide Shiplap Tongue Groove And Plank Walls Part 1
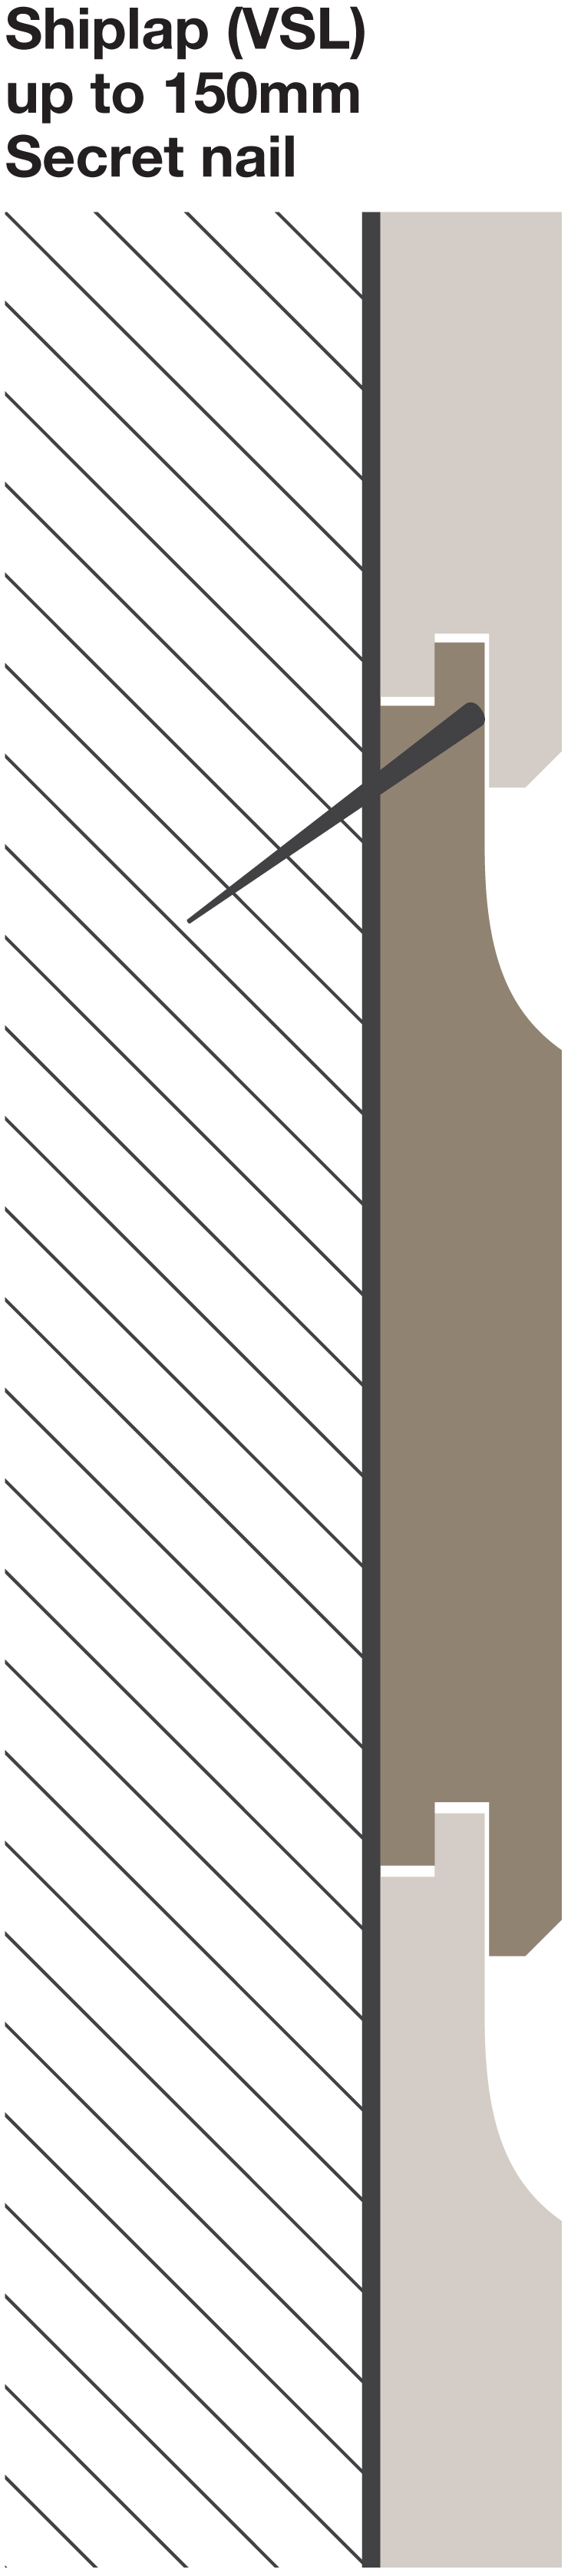
 Methods Of Secret Nailing Shiplap Boards Word Search Puzzle Shiplap
 How To Install Shiplap 14 Steps With Pictures Wikihow
 How To Affix Shiplap Blog

 How To Install A Very Simple Shiplap Ceiling Frugal Family Times
 How To Install Shiplap Step By Step Instructions To Installing Shiplap
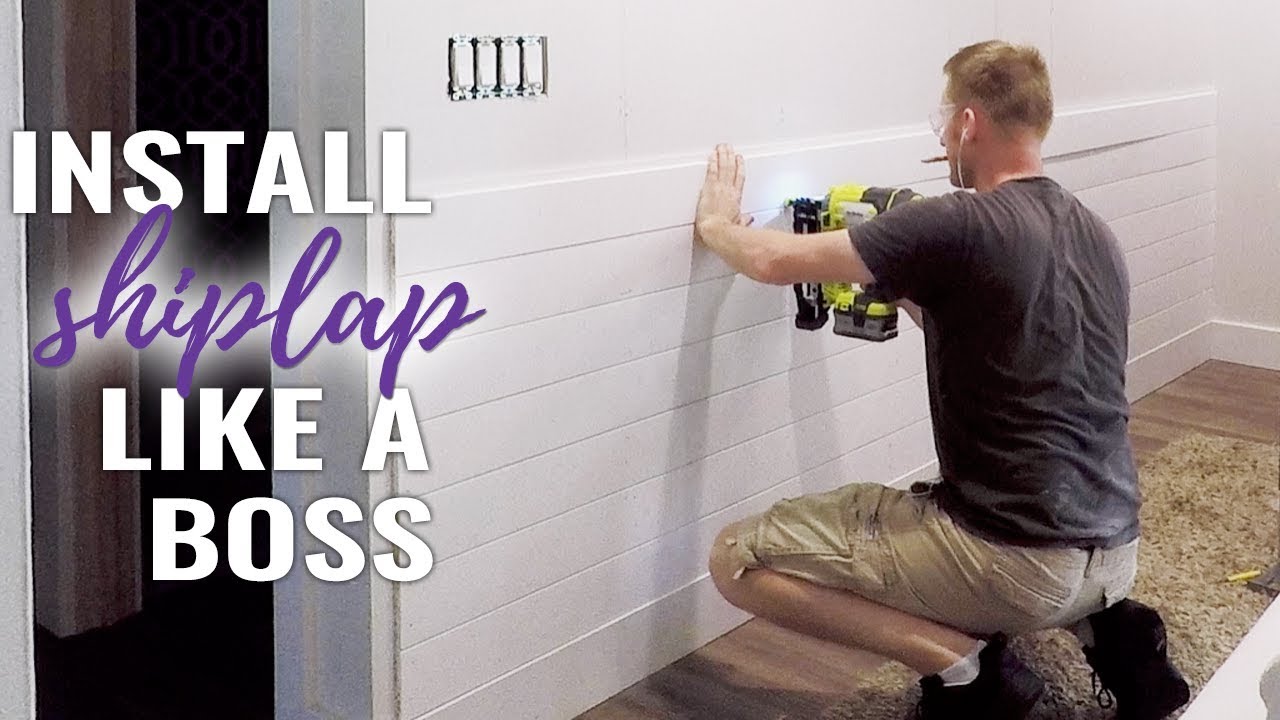 How To Install Shiplap On A Wall Diy Youtube

 Diy Shiplap Walls Because We All Love Joanna And Chip Old Town Home
 How To Fix A Broken Shiplap Panel Waltons Blog Waltons
Comments
Post a Comment